Categories
08 Project Management Fab Academy Providence -Year I - Student Projects Tutorials

Very Basic Beginner Assembly Tutorial III: How to Use Avrdude

First – If you have not already compiled your program

See the Very Basic Beginner Assembly Tutorial: How to Use Gavrasm to Compile a .asm File

If you have compiled your program (created a .hex file)

*Note: If you do not yet have avrdude installed or if you are a windows user and need avr studio – see Lady Ada’s tutorials for detailed information on how to download, setup, configure and use these programs. Lady Ada’s AVR software installation tutorial

Once your AVR software tools are installed:

Again – Lady Ada has excellent detailed tutorials on how to use avrdude check the out for details on what the all the commands are and what they do – I will just give the very basics here to help you program a chip.

1. Open your command line interface and navigate to the directory that contains the file you want to flash to the microcontroller.

2. Connect your AVR programmer to your computer – I prefer the usbtiny (also created by Lady Ada and available at a reasonable price from adafruit studios).

3. If your board has an resonator / external clock you will need to set the fuses first before attempting to program the microcontroller. You must do this first. However, once the fuses are set – you do not have to do it again. The fuses are set only once. You can reprogram the microcontroller as many times as you want after the fuses are set.

example to set fuses:

avrdude -p t44 -c bsd -U lfuse:w:0x7E:m

parts used in this example:
– 20 MHz clock
– bsd cable programmer
– microcontroller – attiny44

You need to change the parts in the code above to match the parts you are using in order for it to work. Ask you instructor if you are confused.

example to set fuses:

avrdude -p t45 -c usbtiny -U lfuse:w:0x7E:m

parts used in this example:

– 10 MHz clock
– usbtiny programmer
– microcontroller – attiny45

4. If you have set the fuses already or if your board does not have an external clock – here is how to flash / program the microcontroller.

generic example to flash microcontroller:

avrdude -p microcontroller -c programmer -U flash:w:program.hex

example with actual data:

avrdude -p t44 -c usbtiny -U flash:w:freqrx3.hex

parts used in this example:

– usbtiny programmer
– microcontroller – attiny44
Categories
08 Project Management Fab Academy AS220 - Providence, RI Fab Academy Providence -Year I - Student Projects Tutorials

Very Basic Beginner Assembly Tutorial II: How to Use Gavrasm to Compile a .asm File

This tutorial instructs you on how to compile an assembly language file (.asm) into a .hex file using Gavrasm (Gerd’s AVR Assembler). the .hex file can then be uploaded to a AVR microntroller using Avrdude (or another program.)

1. Check to see if you have Gavrasm installed.

Open your command line interface and type:

gavrasm

If Gavrasm is installed you will see (your version number may vary):

+------------------------------------------------------------+
| gavrasm gerd's AVR assembler Version 2.5 (C)2010 by DG4FAC |
+------------------------------------------------------------+

2. If Gavrasm is not installed you will get an error.

You can download and install Gavrasm for Unix or Windows: http://www.avr-asm-tutorial.net/gavrasm/index_en.html

*Note: if you are running a Mac OS (especially a pre-intel / PPC – Power PC Mac see my tutorial on where to get the compiled Gavrasm for the Mac OS.

3. If Gavrasm is installed — or once you get it installed:

A. navigate to the directory where the file that you want to compile is located.

– if you are unfamilar with unix commands:

To list the files in your current directory type:

ls

To change directory / navigate into a specific listed directory type (where directory name is the name of the directory you want to move to):

cd directoryname

To move upwards in the directory tree structure type”

cd ..

If you know the pathname of the directory that you want – type in the pathname of the directory preceded by “cd”

ex:

cd  /Desktop/mydirectory/mydirectory2

you can find more about general unix commands b doing a general internet search.

B. After navigating the correct directory – type:

gavrasm filename.asm

where “filename.asm” is the name of the assembly file you want to compile.

4. Gavrasm will compile the file for you and produce a .hex file of the same name as the .asm file.

Warnings:

Gavrasm will inform you if there are warnings. For the most part you can ignore the warnings. Ask your Fab Academy instructor if they are something you should be concerned about.

Errors:

If there are errors in compiling your file – Gavrasm will refuse to create a .hex file and will throw a bunch of error messages at you. Use these error messages to fix the problem.

If you don’t understand them – google the error or look at the datasheet for the microcontroller that you are using. Ask your instructor if you are confused – odds are they have encountered this many times.

You must fix the errors in the program before it will compile.

5. You can now use your AVR programmer and Avrdude to flash your microcontroller with the .hex file you just created

— See  Very Basic Beginner Assembly Tutorial III: How to Use Avrdude

Categories
08 Project Management Fab Academy AS220 - Providence, RI Fab Academy Providence -Year I - Student Projects Tutorials

Very Basic Assembly Tutorial I: Where to Get Gavrasm for the Mac OS

Having problems compiling Gavrasm on your Mac? Here is where to get Gavrasm (Gerd’s AVR Assembler) pre-compiled binaries for the Mac OS.

OS X 10.4.11 – Tiger (Power PC)

Download Anna Kaziunas France’s compiled version

OS X 10.5.x – Leopard

Download Kelly Snook’s compiled version

OS X 10.6.x – Snow Leopard

Download David Mellis’ compiled version

Windows & Linux

Pre-compiled binaries for Windows and Linux are available from the Gavrasm homepage.

Categories
06 Embedded Programming Fab Academy AS220 - Providence, RI Fab Academy Providence -Year I - Student Projects

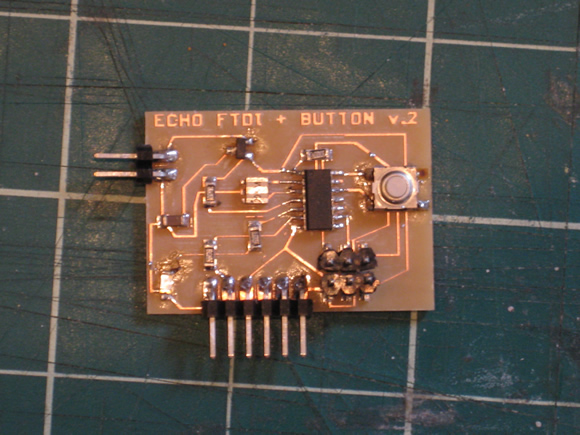
Modified Hello Echo – Part III: Working & Completed Modified Hello Echo + Button + FTDI

Fab Academy Embedded Programming Assignment:

1. add (at least) a button to the serial echo hello-world board
2. modify the serial echo assembly program to respond to the button

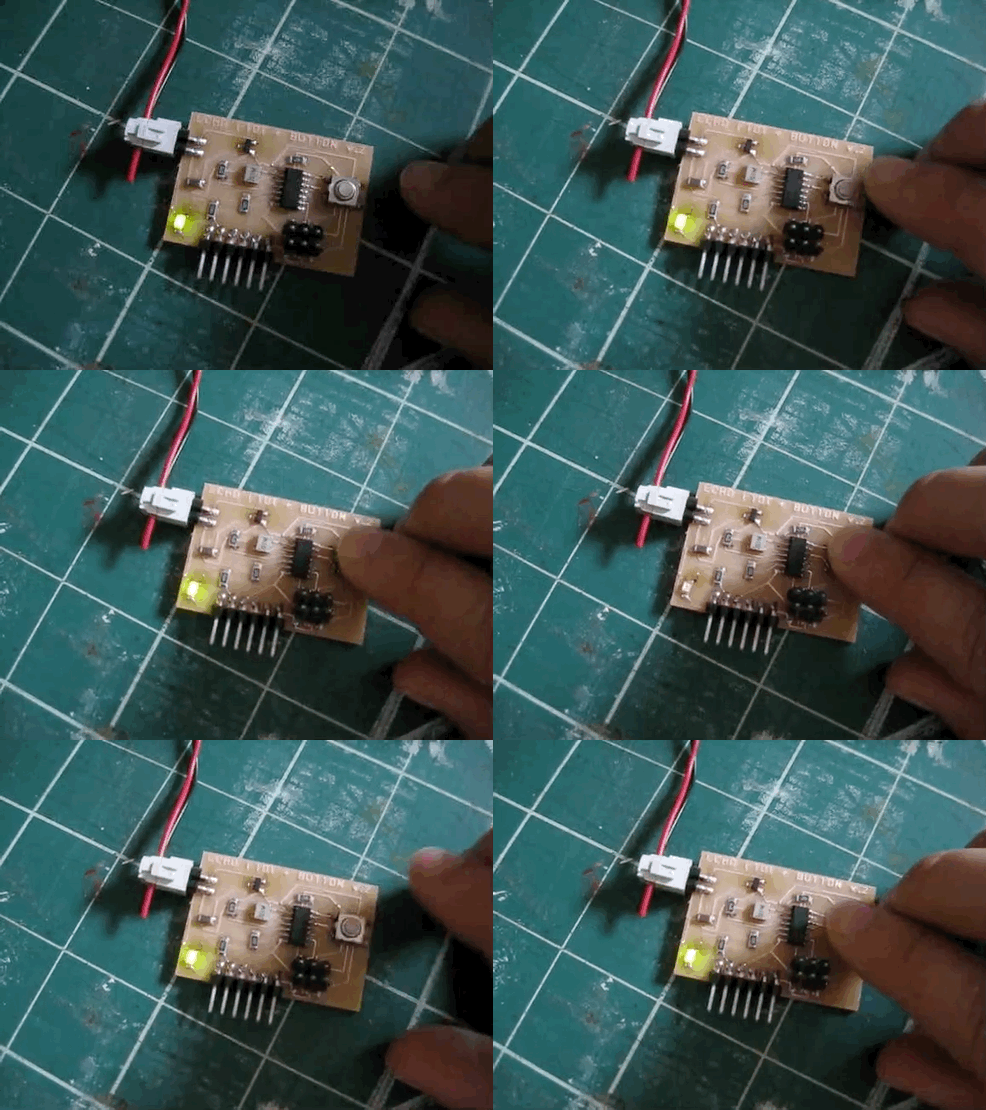
I modified the hello serial echo board (my modified echo board version2 – see previous posts) to respond to a button and added an FTDI header so I could use it as a substitute for the internet 0 serial board. (I have a Mac and therefore no serial port).

The behavior is that the LED is always on – but when the button is pressed, it turns off.

Modified Hello Echo FTDI + Button

Shawn and I modified Elliot’s reprogramming the echo board code.

Here is the code:

; Modified.Hello.Echo.Blink LED.44.asm
;
; blink LED when button is pressed
;
; Code Created At FAB ACADEMY AS220
; by Shawn Wallace & Elliot Clapp
; Last Modified 08/05/2010  - Anna Kaziunas France
;
; Permission granted for experimental and personal use;

.device attiny44
.org 0
cbi DDRA, 1
sbi DDRB, 2
loop:
	sbic PINA,1
   	sbi PORTB, 2
 	sbis PINA,1
  	cbi PORTB, 2
rjmp loop

Here is How to Get the Board Running:

I use an usbtiny programmer.

Copy the above code into a text file and save it with YourFileName and .asm extension.
Compile it using gavrasm:

gavrasm YourFileName.asm

Compiling the file will create a .hex file.

First – set the fuses on your board:

avrdude -p t44 -c usbtiny -U lfuse:w:0x7E:m

Second – flash the attiny44 with the program code you just compiled:

avrdude -p t44 -c usbtiny -U flash:w:YourFileName.hex